Monday, April 13, 2020

This Is Our New Life

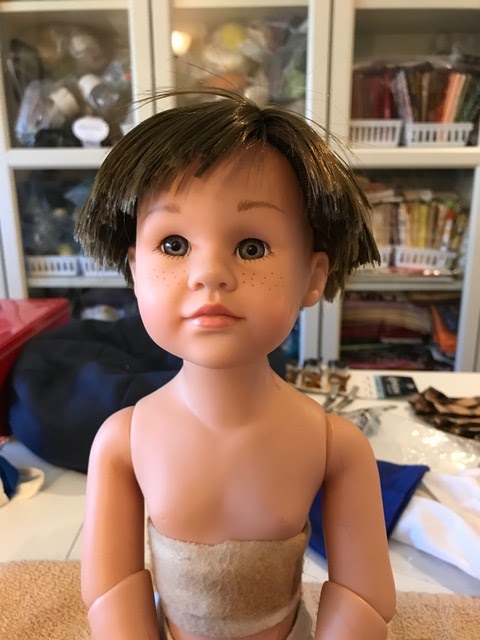
I finished the masks for family members, and they have gone to their new homes. Our granddaughter's birthday doll arrived in Wisconsin on Saturday. About Wednesday I began making them for the hospital.


Fortunately, the hospital has enough for right now, but we aren't scheduled to reach our peak until the 26th, so they will be needing them soon. I do a lot of the cutting first. That way, I don't have to keep looking at the measurements but have them in my head. 


Then I chain-piece the steps I can, like doing all the hems at once. (I can do this if I have a lot of masks that can use the same color thread.


Then I cut out more, and change the thread as needed.


The tutorial I made for myself and others is here.

I communicated by text with our DIL's friend, who is a surgeon at our local hospital. She will pick up the masks on her way to work. When they have enough there, I'll continue to make them for the local police.

I finished the knitting on my Bend in the Road Beanie. Just the ends to weave in and then blocking. I'm planning to make one for DH, only using a different pattern.


I had another story out on Friday, but I also added this to The Doll's Storybook's Facebook page. Emil was wondering if the birds that hatch from these eggs were going to be pretty colors like the eggs.


Friday morning I went to Fred Meyer (Kroger Co.) to pick up my grocery order. I filled up the tank with gas while I was there. I had my mask on but the attendant didn't have one. He took the card from me, rather than keeping his distance. When I got the card back, I sprayed it with alcohol and wiped it off before putting it away. Fortunately, it's unlikely that he's carrying the virus, as none of our county's cases originated in Bend. This is good practice, even if the risk is low.

Getting the groceries went better. I parked in one of the Click List stalls, called the store to let them know I was there, then opened the back of the car. The woman brought the bags and put them into the back while I stood 6' away. Then I closed the door. I cleaned everything when I got home, including everything I touched on the car.

Holy Week services were entirely online. I found them just as satisfying as in-person services. (Yes, those are bunny ears on our priest. He always greets the children first.) We were able to greet each other and make comments during the service without disturbing anyone. There were only six people in the church, and they had the service choreographed so they didn't come within six feet of each other.
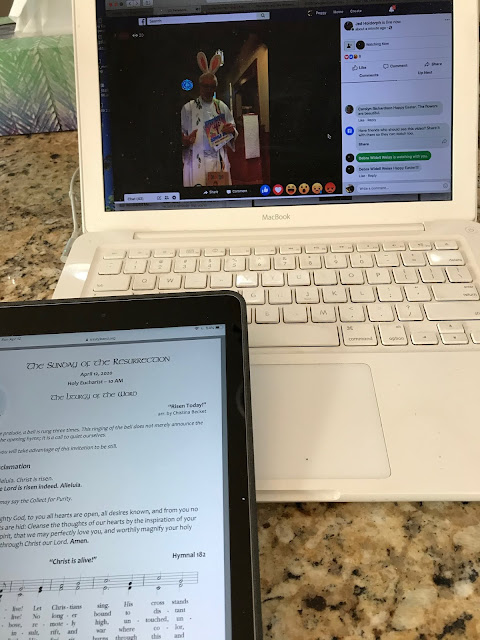


Maybe the sense that we're going through the experience of having to remain isolated and sharing it with all humankind has added more than what not being there in person takes away, if that makes sense. The Easter service was inspiring. The sermon related the experience of the disciples and friends of Jesus with what we're going through together. (It was available on YouTube and on Facebook. The link is to YouTube.)


The family had its weekly Zoom party after church. Our niece and our adult granddaughter joined us this week for the first time. It was good hearing what everyone was up to and to know that they are all well and coping with their situations. Our older son, his daughter (our oldest grandchild) and our niece's husband are all still working in essential jobs, so they are having to take precautions to protect themselves.


We try to walk every couple of days. We see other people out, but we keep our distance. Each entrance to the Larkspur Trail has a sign telling people what the new rules are for using the trail. Most people seem to be cooperating.


Everyone stay safe. We will get through this if we work together.

What's on my needles: The Bend in the Road (The Roadside Beanie) is technically off the needles, but I need to weave in the ends. This one didn't have a steek, so I can't hope to hide the ends with a facing or anything.

What's on my sewing machine: Masks, masks, masks!

What's in my hoop: Still the Whole Cloth Quilt. Another week with no progress.

What's in The Doll's Storybook: Making Do. The car has broken down, and each doll has to figure out what to give Mandy for her birthday without going out to shop.

What's on my iPad/iPhone: Finished The Bridge to Belle Island by Julie Klassen and now listening to Spring Magic by D. E. Stevenson, one of my favorite authors.

What's in my wine glass: Charles Shaw Cabernet Sauvignon, a staple in our wine cellar.

What's my tip of the week: To make ties for these masks, I save a little time and trouble by inserting pins a few inches apart into my ironing-board cover, putting the pins through the fabric cover once and then again about the distance apart I want the tie to be with the edges folded over, in this case 3/4". I insert the fabric under first one pin and then the other. Then I put the iron down on the space between the pins and leave it down as I pull the tie through, guiding the edges of the fabric so they are about equal in size. (Please excuse the discolored cover.)


I need to fold it over again, so without removing the tie from under the pins, I fold it over and then put the iron back in place. I use a spray bottle with water if needed, but if you have water in your iron you wouldn't need to.

Bonus tip: If you have a spare spray bottle or can get one, you can put rubbing alcohol in it and use that with paper towels as a substitute for disinfecting wipes, which are hard to find right now. I had a couple of spray cleaner bottles, neither of which was full, so I consolidated the cleaner into one bottle, washed the other and put my alcohol in it. I labeled it, so I knew which bottle to use for disinfecting.


This is our new life for a while.


Note: This blog post was produced on the iPad and the MacBook, using the iPhone for some photos and some photo processing. No other computer was used in any stage of composition or posting, and no Windows were opened, waited for, cleaned or broken. No animals or dolls were harmed during the production of this blog post.

Thursday, April 9, 2020

Boy Makeover Haircut With Rooted Hair

Here's how Billy got his second haircut:

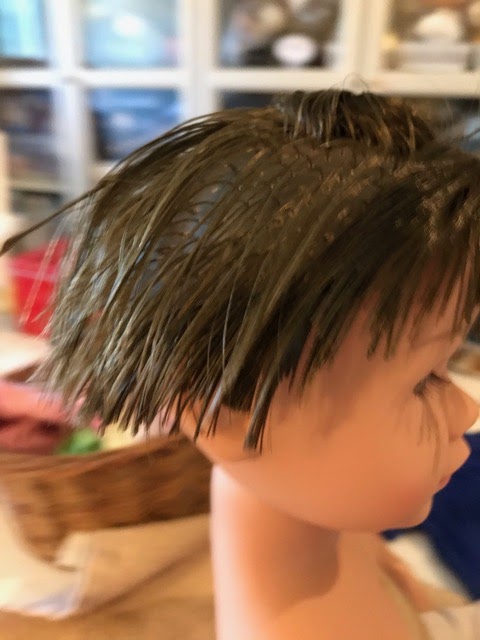
I washed the hair, then, while it was still wet, I separated the bottom row of roots and hair from the rows above it. Then I trimmed the bottom row to about 1/2". It will stick out, but we will deal with that later.


Then I did the same thing with the sides.


The next rows were cut by combing small VERTICAL sections of  hair away from the head and trimming them:


Here you can see the back is done:


I continued around both sides and the front:


Here's how it looked in back:


Here it is in front:

Then I put a wide elastic band around the head while the hair was still wet:


I pulled the rubber band down under his nose, so it wouldn't mash his eyelashes.


Here he is with the hair dry.


Here's a view from the side....


....and the back:

I found it helps to use a glue stick around the edges of the back and sides. I did this when the hair was dry, then put the rubber band on again. This will need to be redone if the hair is washed again, because glue stick washes out.

If you aren't happy with it when it's done and you can't fix it, you can always shave it off and get a wig.

Monday, April 6, 2020

Who Was That Masked Man?

I've been busy making masks this week. I started out with this style.


Then someone said "no elastic," so I switched to this one.


Than our local hospital came up with a pattern they wanted, so I switched again. This one has a place for a filter, and if you look closely, you can see a place for a wire to fit around the top of the nose.


Here's a look at the slot for the wire. The pencil shows where I backstitched and skipped to leave an opening for them to put in the wire.


The hospital will be providing their own wire and filter for each mask.

I wondered what I was going to do with all those masks I slaved over, and someone in my church asked for masks of any type for the Central Oregon Veterans' Outreach. She picked up a dozen for them from my front deck yesterday.

DH has finished putting the hardware on the kitchen cabinets. Here are a few shots of the FO.


Rocky likes to photobomb.


Another view.


The buffet. Now he will have to do the bathrooms. It's so much easier to open drawers and doors now!


We happened to buy this cart a few weeks ago. It's coming in handy as a "dirty" surface when we bring groceries in. We pull the cart out a few inches, put the bags there first, as we take out and sanitize each item, which goes to a clean countertop to await being put away. Then we sanitize the surface of the cart when we're done. It's clean right now, but the bags sitting on it now are the masks I finished that will be mailed to family members when DH goes to the PO this week.


Since I finished my cardigan, I had to start a new project. This is the Roadside Beanie from a kit I bought during the Rose City Yarn Crawl at For Yarn's Sake in Beaverton. (That was literally the last time I was out of my neighborhood!)


I ordered a kit for another hat from the same place. That one will be for DH.

I have been getting Daphne's doll ready to send off. I think she has enough clothes. Because I'm making masks, I raided the doll closet, but she also brought some things with her. I'll take photos before I send her off.

Church services are virtual. They send out a link to the bulletin, and rather than print it, I pull it up on my iPad.


Our weekly Zoom session with the family included my BIL, who is back in town after his trip to Arizona.

We still walk when we can. Mostly these are the only neighbors we see:


I feel sorry for people who are already going stir-crazy. I'm happy to stay at home, where it's safe, and do my things. 


What's on my needles: The Bend in the Road Beanie. I'm using this pattern. It's Colorway #3.

What's on my sewing machine: Masks!

What's in my hoop: Still the Whole Cloth Quilt. Another week with no progress.

What's in The Doll's Storybook: Playing at a Distance. Jolena misses her friend, who has moved away, and Billy shows her how she can still play with her friend at a distance.

What's on my iPad/iPhone: I finished The Vine Witch by Luanne G. Smith. Then listened to Certain Woman of an Age by Margaret Trudeau, which was hilarious but also made me cry. Now I'm listing to Devoted, Dean Koontz's latest novel. I'm almost done with it.

What's in my wine glass: Terra d'Oro Zinfandel 2016. One of our new favorites.

What's my tip of the week: There are a lot of fun things for kids, now free because they are stuck at home. Audible has some free stories in four languages (at least) that are available for free. Harry Potter fans will be interested in the new Wizarding World Website (WWW).


Note: This blog post was produced on the iPad and the MacBook, using the iPhone for some photos and some photo processing. No other computer was used in any stage of composition or posting, and no Windows were opened, waited for, cleaned or broken. No animals or dolls were harmed during the production of this blog post.

Sunday, April 5, 2020

Rotary Cutting Instructions for Together We Can Face Mask

If you have rotary-cutting tools, you can cut the masks out faster. If the pattern is directional, you will need 15 1/4" of yardage that is the full width of fabric, selvedge to selvedge, and at least 40" wide, not counting the selvedges, to make two masks. Here's an example of a directional print. You will want the rectangle to be taller than it is wide.


If the print is scattered with no direction, you can get two masks out of 14".


To start cutting, make sure the fabric is folded lengthwise, selvedge to selvedge, then folded again, bringing the fold up to the selvedges. It will be four layers. Make sure the folds at the top and bottom are parallel, so your ties will be straight. Line up one fold along a line on your mat, with just a little bit of fabric sticking out over one of the vertical lines on the mat. Make sure all the raw edges are over the line. Place your cutting ruler along that line and cut, removing any jagged edges and making a perfect 90º corner between the cut and the bottom fold.


With the cutting ruler, cut FOUR 1 1/2" strips along the edge, one after the other.  These will be the ties. When unfolded, each tie will have a selvedge at each end.


If you have a directional print, like the fabric with the dogs, cut a strip 8 3/4" wide, using a large square ruler if you have one, or if not, the lines on your mat.
If your print is not directional, cut the strip 7 1/2" wide. (By cutting the strip 7 1/2", you will save fabric, if that is an issue.) The photo below shows a 7 1/2" strip ready to cut.


Rotate the resulting strip 90º. Matching up the horizontal lines on your ruler with the bottom of your piece of fabric, trim off the fold on the right side, cutting through all four layers.


Rotate the fabric 180º. Now you will be making the cut that will result in the required 7 1/2" X 8 3/4" rectangle needed for the mask. If you cut the strip 8 3/4", you will now make a cut 7 1/2". If you cut the strip 7 1/2", the second cut will be 8 3/4". Make sure you have a rectangle 8 3/4" X 7 1/2" before you cut. This photo shows the 7 1/2" strip has been cut to 8 3/4".


You will now have four rectangles and four strips, which is enough to make two masks.

It will go faster if you cut out enough pieces for a number of masks before moving on to the next step, but it may seem longer. If you get bored, stop cutting and start marking, pressing and sewing. This is a fun pattern.

Remember: Measure twice, cut once.

Saturday, April 4, 2020

Together We Can Face Mask Pattern Tutorial

The pattern and instructions for the mask can be found here
If you have rotary-cutting tools and need help knowing how to cut out the fabric the fastest and easiest way, there is a tutorial specifically for this project here.

Here's what you're making. A filter (they will provide for themselves) will fit in the pouch, and there is a slot for a wire to fit to the nose (also not our responsibility).


Wash the fabric in hot water, dry and iron smooth. If you have yardage, you can fold it in half longitudinally and then again longitudinally so that you have four layers. Be sure that the folds are parallel and crisp. 


The easiest way to cut the fabric is using a rotary-cutting equipment: mat, ruler and rotary cutter. If you don't have these, you can make a paper pattern, pin it on the fabric and cut the mask pieces out.


Cut:

2 strips 1 1/2" wide from selvedge to selvedge or at least 36-38" long, which will be trimmed to length later. (I like to cut 4 strips, because when you cut through the four layers, you will have enough of the main mask pieces to make two masks.)


 For each mask, you will need 2 rectangles 8 3/4" X 7 1/2". (When you cut through the four layers, you will have enough for 2 masks.)


Press each 1 1/2" strip in half longitudinally. Then press each raw edge of the length in to the middle of the strip. Finally, press the whole piece with the two edges tucked in. (A bias-tape maker or folded-tape maker speeds this up, but you can put two pins in your ironing-board cover, spaced a few inches apart and do the same thing.)


It will look like folded bias tape. These will be the ties. (You could use commercial bias tape, but it will be stretchier, which could result in the stitching breaking, so if you use bias tape, you will need to use a zigzag or other stretchy stitch for the ties.)

Marking the rectangle for pleats:

Note: In the diagram/pattern on the second page of the instructions, the lines are called "Step 1(B) through 2(D)," so we will call each line by those names.

Take one of the 8 3/4" X 7 1/2" rectangles and, with the right side of the fabric up, draw a line 1/2" in along the narrower edge of the rectangle using a fabric marking pencil. This will be the bottom of the mask, Step 1(B).

Draw another line 1/4" from the bottom raw edge, Step 1(A) (optional).

Then go up to 2 1/4" from the same edge and draw another line, Step 2(D).


Turn the rectangle 180º and measure 3 1/2" from the opposite edge, still on the right side, Step 2(B). (This side will be the top of the mask.) The right side of the rectangle will look then like this:


Now turn the rectangle over as if you were turning a page in a book. On the wrong side of the fabric, draw a line 3 1/4" from the bottom raw edge, Step 2(C). (If you turn a corner of the rectangle over, you should see the two lines 1/4" apart, or one, if you only drew the 1/2" line.)

Rotate the fabric again and still on the wrong side of the fabric, draw a line 2 1/2" down from the top, Step 2(A).

The wrong side of the rectangle should then look like this:


I found it helpful to have a summary, so I wrote this:

RS
1/2"
1/4" (optional)
2 1/4"

Rotate 180º

3 1/2"

Flip (check to make sure you're at the bottom, with the 1/2" marked)

3 1/4"

Rotate 180º

2 1/2"

Repeat for the second rectangle.
If you're making a lot of masks, it may be helpful to mark a lot of them at one time. It's easier to remember the sequence (1/2, 2 1/4, 3 1/2, 3 1/4, 2 1/2).

Now to press the folds:

Fold on each line on the right side and press each one thoroughly. 


Turn the piece over and do the same with each line on the wrong side. Turn up the bottom raw edge to meet the first line marked and press. Then fold it again on the line and press again. These will be the bottom hems.


Do the same with the second rectangle.

On the right side of fabric and holding the hem closed, stitch 1/8" to a scant 1/4" from the folded bottom edge of each rectangle.

(You can chain piece these to save time, or use a scrap of fabric between steps. That way, you don't have to cut the thread and start again each time.)


Pin the folds closed, making adjustments as needed to be sure that each side of the mask will measure 4 1/4".


I made a pressing template for myself. It's a rectangle 7 1/2" X 4 1/4" on a piece of paper. I can put the piece I've just folded on it, and press and pin to those dimensions.


Sew each edge to hold the folds closed using a 1/4" seam. Press.


Pin the rectangles together, right sides together and top raw edges lined up. Sew the two pieces together using a 1/4" seam.


On the right side, press the seam to one side.

Fold the mask with this seam up and the wrong sides together. Mark the wire nose piece slit according to the pattern along the top seam edge, beginning and ending 1 3/4" in from each side and 1/2" deep, leaving 3/4" open for the wire to be inserted. (I like to start at the far left, sew the vertical stitches, backstitching at the beginning, pivoting at the corner and sewing to the mark for the opening, backstitching, then lifting the presser foot and moving to the base of the right-hand end of the slot, inserting the needle again and sewing the other vertical stitches, backstitching at the beginning and end. That leaves a thread you can clip off afterwards.


Attaching the ties:

Find the middle of each tie. Open the folds and place the middle of the tie open against the center of the side of the mask that has the pleats, matching raw edges. Pin in place. (This doesn't have to be too exact, because you are going to trim the ties.)

Sew the tie piece from the top of the mask to the bottom along the raw edges with a 1/4" seam. 


Fold the part of the tie that attaches to the mask around the raw edges and pin in place. Beginning at one end of the tie, sew the tie closed, sewing over the side of the mask, backstitching at each place where the tie is sewn to the mask.


Repeat for the other tie. Press.

Trim each tie at 16" from the edge of the mask, or tie a knot close to 15" and cut the tie at 16" (optional)


If this is going to a hospital, they will insert the metal wire for the nose and a filter in the opening at the bottom. If you're making this for yourself or a family member, you can insert a pipe cleaner or other flexible metal wire for the nose. You can make your own filter using two layers of cotton flannel, 6 1/2" X 3", sewing them together and finishing the edges with zigzag.


Note: The hospital will provide its own filter, so this step is unnecessary if you're donating your masks.

Keep in mind that this mask may provide some protection to the person wearing it and probably more to people in the vicinity. It is not a medical-grade mask and should not be relied upon for complete protection. Use it if you are sick to protect your family members. Use it if you must go out, but be careful what you touch and be sure to wash your hands thoroughly when you come home, as well as wiping down anything you bring home with you using a disinfectant or alcohol. If you don't absolutely have to go out, stay home. You can make more masks.


Note: I will be updating this blog post as I get more photos or have more experience with the pattern or comments indicate something needs rewording. Thanks for your patience.

Credit: St. Charles Health System