Showing posts with label Götz Little Kidz. Show all posts

Monday, March 21, 2022

Design for Life

St. Paddy's day is always time for celebration at our house. We had a multinational menu with our usual Guinness, this time in a Finnish beer glass, a souvenir from one of our trips to Finland.


I've made some progress on the Hinterland Pullover. Here's how it looked on Sunday.


I've ordered Götz Little Kidz Paul for Zachary for his birthday. It's going directly there, so Pippa is having to act as my model for outfits. I got the pajamas all done but putting on the buttons. I may have to adjust the sleeve length, I think.


I'm planning a shirt and some jeans, and maybe a nice pair of slacks, if I have time. I'll have to send it off the end of the first week of april to get there in time.

We had Rocky in to the vet. He has some kind of a skin lesion that is infected. It doesn't seem to bother him, but the vet wanted to clear up the infection before sewing it up. He thinks he can do it with a local. We have his care worked out as far as taking him out at night and looking after him during the day. He has a little trouble eating and drinking without stepping on his dish and knocking it over, so we got the dogs a raised feeding station. We discovered during our trip to visit the Beaverton grandkids that this worked well, especially for the water, which all three dogs shared from Louis' elevated feeding station. (The black mat is designed to go under a litter box, to keep the litter from getting tracked all over the floor. We got it to give Rocky a little traction on the floor, and it does work for that.)


We have been working on the taxes. DH figured out that I've only lost about $150 on my publishing foray, which was a lot less than I thought. He also was shocked to find that my screwy bookkeeping actually balances.

We had another online get-together with fans of Madroña Vineyards. They had sent us a recipe for chimichurri sauce to go with macaroni and cheese and chorizo sausage, with a special wine, which was sent to each participant. We were supposed to take a sip of the wine with the mac and cheese, then try it with the chorizo added, then add the chimichurri to the whole thing and see how the wine changed. They used Annie's Mac and Cheese, but I made mine from scratch. I used Soyrizo, since we don't do meat. I made the chimicurri according to the recipe, although I cut the recipe in half. It was a delightful party.

Friday night, we had a Zoom date with our younger son and his wife. (They are the ones who live in Beaverton.) They had given us a two-part membership in Flaviar. We got to pick a tasting set. We chose the New World Single Malt. 


It turns out, they are coming to visit the middle of this week, so we can enjoy the tasting together in real life, instead of on Zoom.

I'll be doing the H-word for the next few days, and then I'll be busy with them. Anticipating that, I wrote two stories for The Dolls Storybook, so I don't have to do one this week. I have several ideas for the following week. I'm coming up on 200 stories, one a week, with no breaks.

For some cuteness, Johan had another chess tournament on Saturday. Two losses and three wins, an improvement over the previous tournament. He took second place in his age group. Not bad!


If you have a few minutes and are willing, please go to Amazon and B&N and search for "Emil: Stories from The Doll's Storybook by Peggy Stuart" in Children's. Every click on the page for the book makes it more likely they will keep a good supply in their warehouse and stores. If you are outside the US, you may have a separate website for these retailers. If you have a copy of our first book, Mariah: Stories from The Doll's Storybook, it would help if you left an honest review on the websites, especially if you bought from them.


Where's my blog: If you want to follow my blog, go here and sign up to follow.

What's on my needles: Still the Empower Kerchief (a few more rows done in the dentist's office) and the Hinterland pullover (see above).

What's on my loom: Same as last week.

What's on my sewing machine: PJs for Zachary's Paul.

What's in my hoop: Same as last week.

What's in The Doll's Storybook: Caring for Pets––A Poem. The cast of The Doll's Storybook shares what is involved in keeping a pet. Be sure you know what you're getting into and can live up to expectations before getting a real pet.


What's on my iPad/iPhone: Finished Unthinkable by Jamie Raskin. I can really recommend it, especially if you want to know more about what happened at the Capitol on January 6th of last year, coinciding with a long eulogy to the author's deceased son. It was beautiful and gut-wrenching. Now listening to The Sanitorium by Sarah Pearse, a thriller. Both are on the Audible app. 

What's in my wine glass: Ithafa Western Cape Shiraz, 2019. Excellent.

What's my tip of the week: Here's my recipe for Cream of Mushroom Soup à la Morinu. I had planned to take a photo of the soup in a bowl, but it somehow disappeared. This is a high-protein, low-fat version of this creamy favorite.

Ingredients
• 4 T olive oil 
• 1/2 lb mushrooms, sliced
• 1 onion, chopped
• 1 carrot
• 4 garlic cloves minced
• 1/4 t thyme 
• 1 t lite salt
• 1/8 t Pepper
• 4 cups water
• 1 2-cup bouillon cube
• 1 t psyllium husks
• 1 box Morinu silken tofu (shelf-stable, found in the Asian Food section, either firm or soft is OK)

• Parmesan cheese for serving

Directions
In pressure cooker pan, sauté vegetables in olive oil for a few minutes until slightly softened. Add water, thyme, salt, pepper and bouillon cube and bring to full pressure. Cook for 2 minutes.
Add tofu and psyllium and blend in blender or use immersion blender. Heat up until just serving temperature.
Top each serving with Parmesan cheese.

Where are my books: The stories in each book first appeared in the blog and they are reproduced with few changes. Emil: Stories from The Doll's Storybook is now available for preorder from booksellers world wide. The link for Book Baby is here. The three stories are Best Buds, Getting What You Want, and The Boys Cook Dinner.
Mariah: Stories from The Doll's Storybook is also available. The three stories in the first book are Being Little, Besties, and Distraction.
If you don't get free shipping from Amazon or B&N, buy from the BookBabyBookshop, because 50% of the price goes to St. Jude. Other booksellers pay much less. 


Note: This blog post was produced on the iPad and the MacBook, using the iPhone for some photos and some photo processing. No other computer was used in any stage of composition or posting, and no Windows were opened, waited for, cleaned or broken. No animals or dolls were harmed during the production of this blog post.

<a class="blsdk-follow" href="https://www.bloglovin.com/blogs/highfiber-7365001" target="_blank" data-blsdk-type="button" data-blsdk-counter="false">Follow</a><script>(function(d, s, id) {var js, fjs = d.getElementsByTagName(s)[0];if (d.getElementById(id)) return;js = d.createElement(s);js.id = id;js.src = "https://www.bloglovin.com/widget/js/loader.js?v=1";fjs.parentNode.insertBefore(js, fjs);}(document, "script", "bloglovin-sdk"))</script>

<a href="https://www.bloglovin.com/blog/7365001/?claim=kkvctsdtf4n">Follow my blog with Bloglovin</a> 

Thursday, August 5, 2021

Pippa's Hooded Sweatshirt and Pants


Patterns from The Doll's Storybook


Pippa's Hooded Sweatshirt and Pants

(To fit Götz Little Kidz)


Materials:

1 pair girls' size XL14-16 full-length leggings

Separating zipper (any size, as it will be cut to fit); thinner is better if you can find it.

Cotton yarn or string that matches or coordinates with your leggings fabric, at least 20" for the hood and 16" for the pants. (There is no need to cut it first.)

1/4" elastic for the pants waistband (7", but it will be easier if you don't cut it first).

Matching thread.

You will also need a yarn needle with a big eye to thread the drawstring through the hood casing. (A tiny safety pin will work if you don't have one.)

A medium-size safety pin for feeding the elastic through the pants casing.

You may need good light to tell which is the right side of the fabric.

Note: I use freezer paper for my pattern pieces because I can iron them onto the fabric, shiny side down, and they will stay. I use a rotary cutter to cut the straight lines, then pin and cut the curved lines with scissors.

I have lined the pockets and hood. If you like, you can hem the pocket opening and fold over the top and the bottom before sewing the pockets on. You can make a simple casing on the front of the hood with a buttonhole at each end for the tie and do away with the lining. You could also imbed the neck front and back pieces between the layers of the hood for a more finished look. I was too lazy. If you sew this for a taller or shorter doll, you can lengthen the pants, sleeves and body easily. There is no need to change the pocket.

Instructions: Print pattern at 100%. Make sure the 1" gauge measures 1"

Turn the leggings inside-out and cut the seams off. (The elastic at the top can stay. It won't be in the way, but you will need to cut it to get to the seams.)

Cutting:

Fold one leg of the leggings in half vertically so that the grain lines follow the fold. Place the front, back, sleeve, pocket and bottom ribbing on the folded fabric. The photo shows how I placed them. 


You may have room for the second pair of pocket pieces in the area next to the front piece. Cut out the pattern pieces, including the second pair of pocket pieces. 

(One pair of pocket pieces can be cut across the grain, if you want. These can be used for the lining. Just be careful when you sew them together to put them on the inside.) Here's how I did it, because it saves fabric, and sometimes there's enough left to make something else for a doll.


Open the remaining leg fabric and fold it horizontally, matching up the grain lines. You will cut the hood piece out twice. 


There will be enough room to cut out the sweatshirt cuffs from the remaining fabric after cutting out both hood pieces. Each piece will make cuff ribbing 3" X 3/4".

Fold the other leg vertically or horizontally to find fabric big enough to fit the sweatpants piece.


After cutting out the pants, cut the cuffs out of remaining fabric, making sure the grain is running in the right direction. They will be 1 1/2" X 4".


Sewing:

Sweatpants:

(Note: With the exception of the cuffs, these sweat pants are made the same as the pajama pants. The pattern piece has been shortened to make room for the cuff at the bottom. I recommend pressing each seam as you sew.)

Before putting the pattern aside, make a small mark within the 1/4” seam allowance on the wrong side of each piece to indicate which seam is the back. 


Pin the two front curved edges together. Repeat for the back. Sew front crotch seam with a 1/4” seam allowance. Repeat for back crotch seam. Press seams flat to set the seam. Do not press open.

Finish both seams with zigzag or using a serger, connecting the raw edges. There is no need to clip curves.


Turn to the right side and press both seams to the left. In other words, press the front seam to the left, then turn your work over and press the back seam to the left. The opposing seams will be going in opposite directions as you look at your work. (This is important for having the front and back seams nestle together and for inserting the elastic easily.)


Match crotch seams and pin with the two seams nestled together, so that both seams go in the direction they were pressed and opposite from each other. (If they don't nestle together, now is the time to fix it.) Pin the leg edges together, matching the leg edges at the bottom. 

Starting at the bottom of one leg, sew a 1/4” seam up that leg, through the crotch and down the other leg. Finish with zigzag or serger.


Turn to right side and press seam toward the back.

Turn under waist edge 1/4” and press. Turn under again an additional 1/2” and press.

Pin casing hem in place, making sure the crotch seams are still in the direction they were pressed. (If you pressed them to the right instead of to the left, you can still insert the elastic easily, but from right to left. However, make sure one of your seams didn't flip over at the waist. It could be difficult to get the elastic through the casing where you have to cross the front seam.)

Starting about 1/2” from the back seam, sew close to first fold for elastic casing, leaving about 1” open between beginning and end, finishing about 1/2” from back seam. (You don't need to measure; just leave enough space to insert the elastic.)


Mark elastic at 7” but do not cut. 


Attach safety pin to the end of the elastic you measured from. Use safety pin to thread elastic through casing and out the other end. 


Remove safety pin and match that edge of the elastic to the mark you made when you measured, pulling both ends of elastic out as far as possible, but making sure the elastic is not twisted. Keeping the two sections of elastic even, sew close to the mark, backstitching several times. Now you can cut off excess.


Adjust elastic back in place in the casing, and starting from the upper edge of the waist, sew down to the casing seam already made, then pivot and sew along the casing to where you started sewing the casing, pivot and sew up off the upper edge of waist. This will make it easier to tell which is the back of the pants until you get the optional “drawstring” bow on, and will avoid having to backstitch. 


Take the two cuff pieces and sew the short edges together. Press seams open.


Fold the resulting cuff tubes wrong-sides-together and match up raw edges. Press well. A little steam is helpful.


Turn pants inside-out. Insert one of the cuffs into one pants leg, folded edge first, right-sides-together and matching raw edges. Stretching cuff to match pants leg, pin in place. (I find it helpful to push the pins all the way in, so only the heads are sticking out.) Starting at the inseam, sew cuff onto pants leg with a straight stitch, pulling out pins after you pass them and making sure the sewing machine doesn't catch the pins. After sewing all the way around, without cutting the thread or taking your work out of the machine, switch machine to zigzag and finish the edges by sewing around one more time.


(If your sewing machine makes it too difficult to keep the pins under control as you sew, you can baste the cuffs on by hand. This may be necessary when doing the sleeve cuffs, which are even smaller.)

Take some of the cotton yarn or string (about 16") and tie a bow. Find the middle of the bow and untie the yarn, keeping track of where the middle of the bow is. Sew this spot in the front of the pants, right where the drawstring would be tied. Retie the bow. Tie a knot in the end of each end of the tie, right above the length you want each end to be. Trim off the excess, if any.


Sweatshirt:


If you cut two pieces across the grain, be sure to use those pieces as lining. Sew each pocket as shown, leaving the squared-off sides open. Trim off the corners. Press to set the seams. Turn to the right side and press again.


Take the front pattern pieces and match the pockets up with the lower and center edges of each piece, making sure that the grain lines of the pockets are vertical (lining inside, if it's different) and that the narrower edge of the pocket is up, as shown. Sew along pocket 1/4" at the top, backstitching as you begin. Then using a 1/8" seam, sew down the center front, pivot and sew along bottom edge still with 1/8" seam, then up the side of pocket with a 1/4" seam, ending with backstitching. (When you sew the zipper in, you will be using 1/2" from the center front. The bottom ribbing seam will be 1/4", so you want to stay within that, but this will keep the edges of the pieces together.)


Take the back piece and match up the shoulder with the two front pieces. Use pins if you like. Sew a 1/4" seam and finish with zigzag or serger.


Pin sleeves in place, easing any fullness along armscye. (I found it easier to sew with the sleeve piece up.) Sew in place, stretching gently and being careful not to get extra layers of sleeve under the needle. Finish seams. Match underarm seams, and pin front and back pieces and sleeve sides. Sew and finish seams.


Turn right-side-out and press seams to one side. 

Fold bottom ribbing in half lengthwise and press. Pin evenly along bottom edge of sweatshirt. Sew with 1/4" seam and finish. Press seam up.


Fold the center front edges of the sweatshirt along fold line (1/2") and press. Take two sides of zipper apart. Making sure you have the zipper right-side out, move the zipper pull all the way to the top, out of the way and pin that side of the zipper to the sweatshirt front. Pin in place.


Here the voice of experience will recommend basting the zipper first, then sewing it down after you are sure the top edges of the pockets match. After you have basted one side, pull the zipper pull back down to the bottom, connect the zipper and then pin the other side in place, matching the pocket tops and the bottom of the ribbing, easing to get them to match. The fabric will stretch in a different direction when you sew, causing them to get out of alignment, so use lots of pins and baste first. When you are satisfied with the placement, separate the zipper,  slide the zipper pull back to the top and sew both sides down. Then bring the zipper pull back down the sweatshirt front. Using a zigzag stitch and stitch length set on 0, stitch several times over the top of the zipper on each side, to keep the pull from accidentally coming off. This is just like sewing on a button. Be careful not to break your needle on the zipper teeth. Set your work aside.


Take the two hood pieces and fold each piece, right-sides-together. Sew together from the open end to the fold, tapering the seam before and after the fold to align with fold. Repeat for second piece. Press seam open as far as you can. You do not need to finish edges.


Put the two hood sections together, right-sides-together, matching seams and pin along open front edges. Sew hood sections together beginning and ending 1/2" in from the bottom of each side, using a backstitch to secure seam.


Press seam open. There is no need to finish edges. Turn right-side-out with hood lining to the inside. (It does not matter which way, unless you have cut one of the hood pieces across the grain.) Sew a 1/2" casing beginning and ending 1/2" from edge of hood, beginning and ending with backstitching. Take the 20" piece of cotton yarn or string and thread a yarn needle with it. Run the yarn needle with the yarn through the casing. Try the hood on now. Make a knot in one end and tie a bow under the dolls chin. Then cut the yarn the length you like and knot the other end.


Now you will sew the hood to the sweatshirt. You will sew only the outer hood piece to the body, then fold the inner hood piece under and sew by hand to the body.) Pin in place and sew and finish seam. Start by pressing up 1/4" along the raw edge of one hood piece.


Match the two ends of the unpressed side to the body of the sweatshirt.


Pin the raw edges together as indicated in photo.


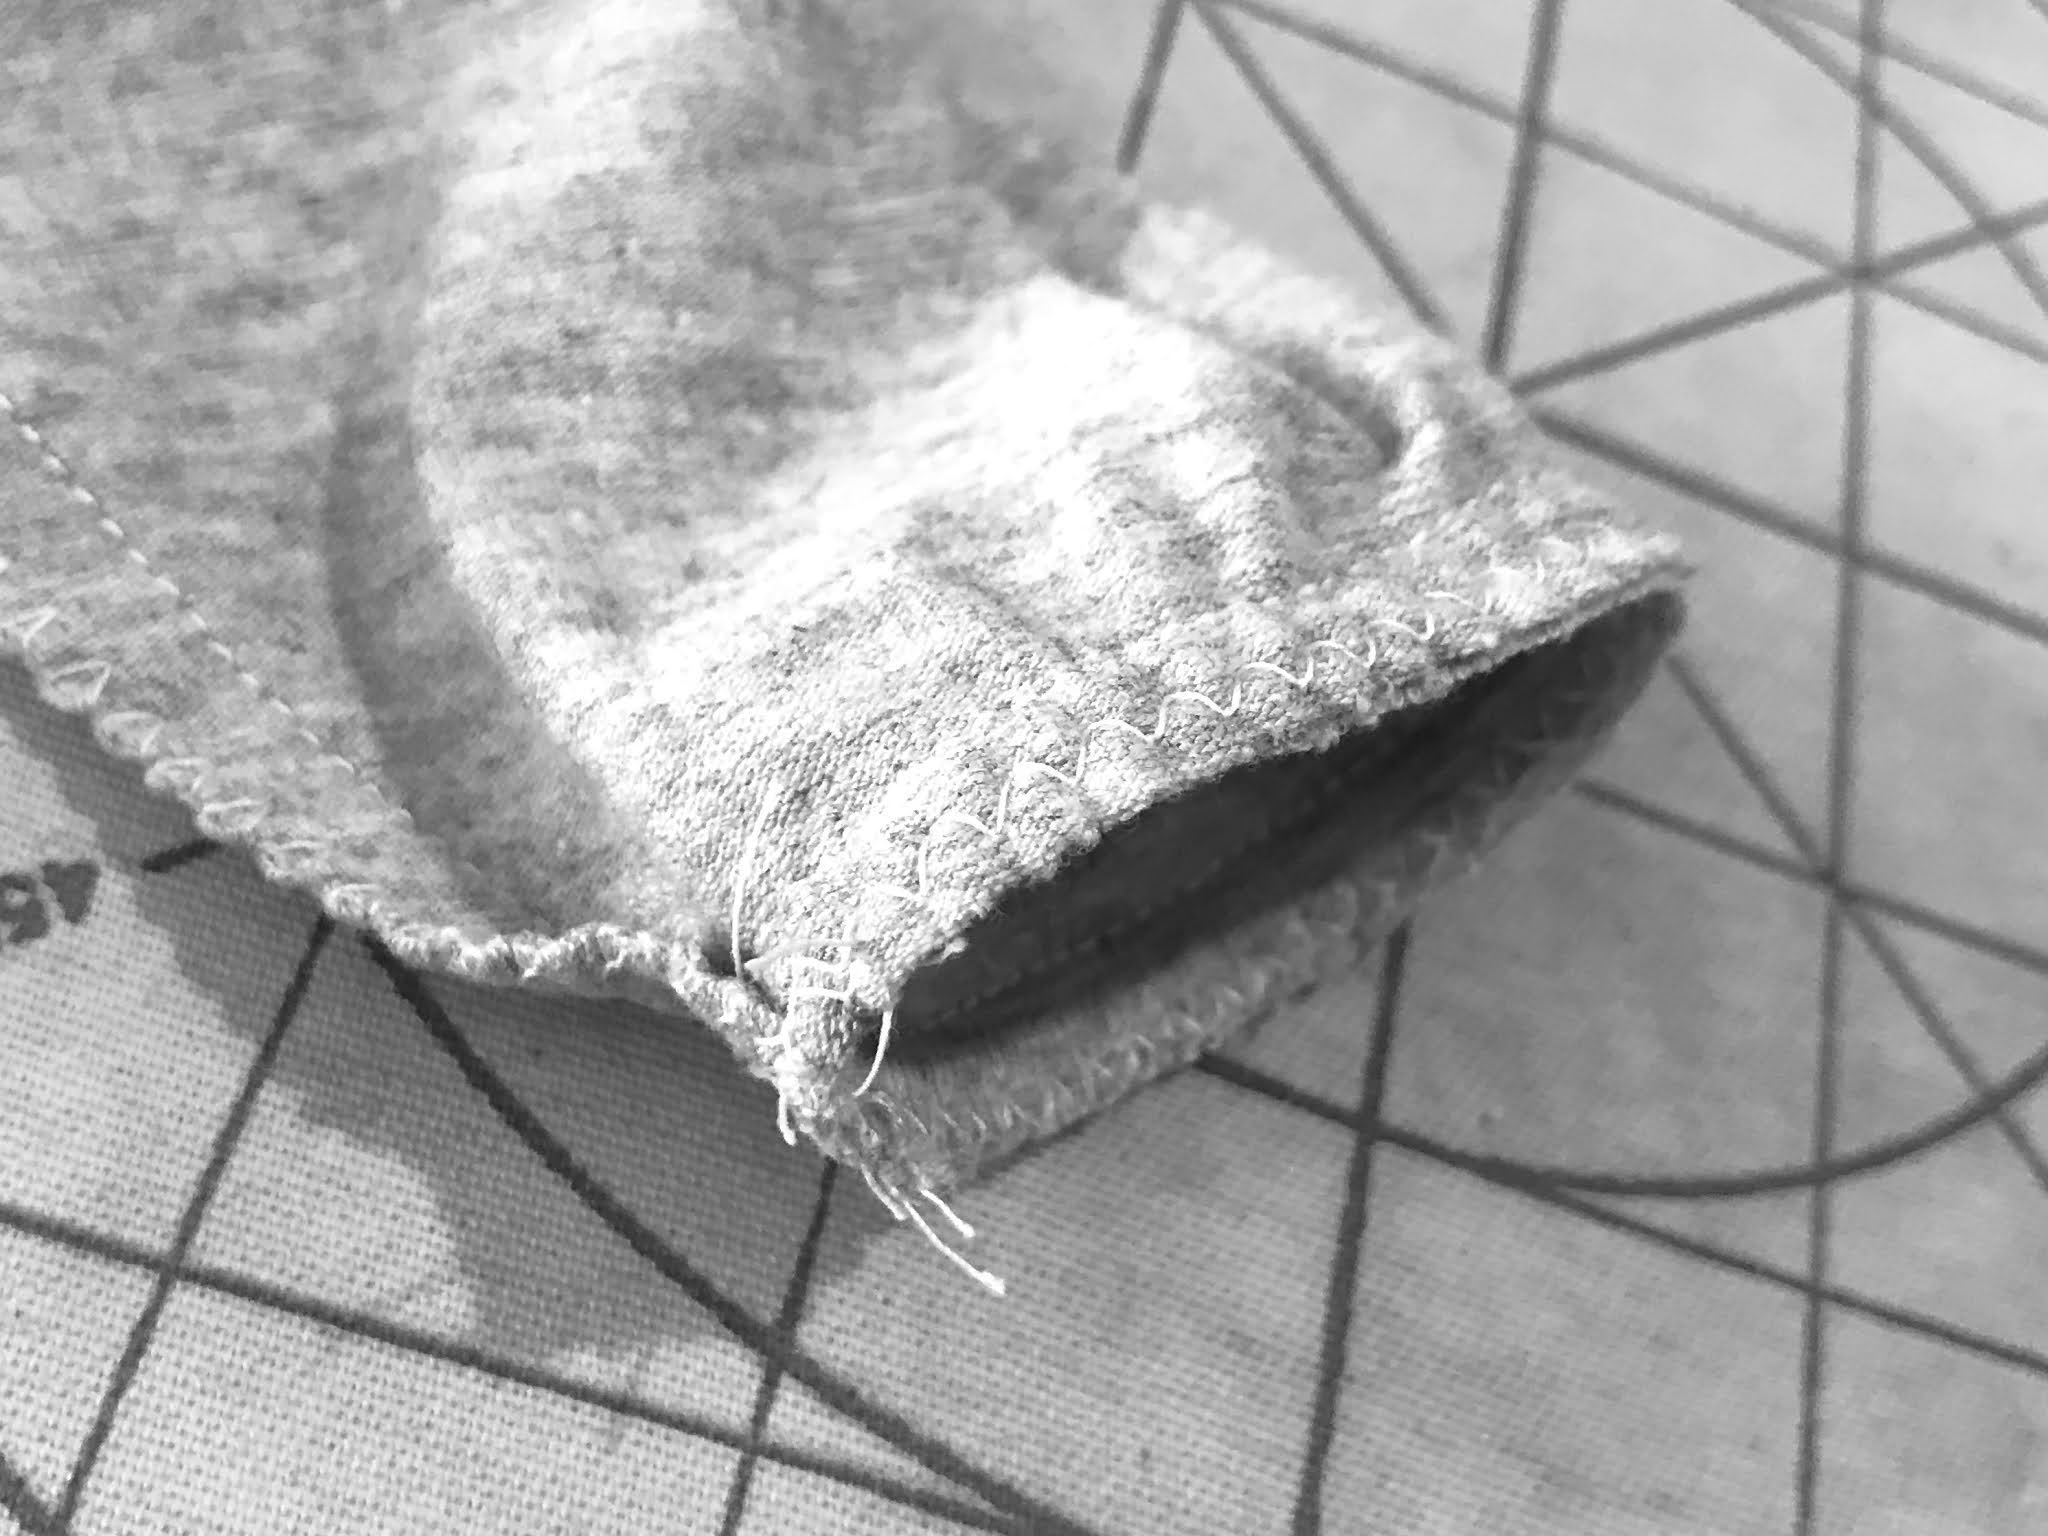
Sew together with a 1/4" seam. Press seam up. There is no need to finish seam. Match pressed 1/4" edge of other side of hood with stitching on the wrong side and sew closed with a blind stitch. If you catch the exposed stitches of the seam it will be invisible on the other side. Press seam again.


Finally, you will sew the cuffs. Fold the cuffs and sew short ends together, as for the pants cuffs above. Press seam open. Turn right-side out and fold in half so the raw edges are together. With right-sides together, sew to the bottom edges of the sleeve. (As these cuffs are smaller, you may find it helpful to hand-baste the cuff in place first, so you do not have to deal with having pins get in your way.) Repeat with other sleeve. 


The finished hooded sweatshirts should look like this:


Pattern Pieces:


This pattern is offered for free. If you would happily have paid for it and are willing to do so, please donate what you would have paid to St.Jude: http://events.stjude.org/TheDollsStorybook

Revision 1, 8/5/21
This pattern is protected by copyright. Any items made from it may be sold. 

Copyright © 2021 by Peggy Stuart 


Monday, April 26, 2021

Hooray for Lifelines!

Oops!


If you look where the stitch marker is, you will see where I added a quadruple increase where it shouldn't be. I guess this pattern hasn't yet become mindless. The white line below that is the lifeline. I discovered the mistake a little late, but was happy the lifeline was in place. It's faster to re-knit the rows I had to frog than to try to pick up the stitches across the row where the mistake is. Why not just drop down and repair, you ask? Every stitch that didn't belong means extra yarn where it doesn't belong. The only way to get rid of all the extra yarn would be to cut it and weave it in. That's a lot of work, too, and then it might not look as good. But that's what lifelines are for, right? I have reknit the frogged rows without the mistake, moved my lifeline to right above where the mistake had been (using thread this time because I found the cotton yarn a bit too thick), and moved on. The marker now indicates only the center stitch.


After cleaning up my workroom, I sewed some buttons onto Pippa's overalls. The little knots were cute, but very time-consuming to untie and retie with costume changes.


I did a little more "repair" work that had piled up and then got busy making the rest of the clothes for Lotta, Daphne's birthday doll, so I can send her off in style. Pajamas were a necessity, now that she has a nice coat, so I made those next. (The bear will be going with Lotta, too. Pippa still has the tan bear, her special friend.)


I decided Pippa needed some leggings. These are made from some very stretchy exercise-attire fabric I bought the same time as the flannel for the PJs. Once I had the leggings done, I made her a blouse out of some quilting fabric I had. It's the same fabric as Pippa's blouse, but a different colorway. Lotta will get the shoes, too, because they go so well with the leggings.


Pippa had two knitted turtlenecks, because I had to make a second one to test my pattern. I decided to send one with Lotta. I had some denim-look leggings fabric left from a previous project, so I made another pair of leggings for Lotta, this time ankle-length. Pippa will keep her pink trainers. Lotta's shoes are identical, but white.


The blouse looks cute with a pleated skirt, so I made Lotta one like Pippa's, this one in some quilter's cotton fabric in a pattern that looks like fine burlap. I thought the color was perfect to go with the blouse.


It's great to have such a wonderful fabric stash.

My sourdough starter needs to be fed weekly, and I refuse to throw out edible food, so I decided to use some to make pizza dough. One loaf's worth of dough is enough for two pizzas. This one went into the freezer after baking.


This is the one we're eating. (That's chopped fresh basil in the background.)


The AeroGarden is coming along nicely. We've been using the salad greens, but the tomatoes aren't ready yet, as you can see.


Here's another view. I think we will have a lot of little tomatoes, once they start ripening.


We went to the dog park twice this week, including a visit on Friday right before the pups went to the groomer. They slept pretty much all day Saturday, and here they are Sunday afternoon, still tired. 


We had sleet for about an hour during the afternoon.


There was some accumulation. It looks as if someone opened up a giant beanie baby.


This week's story was the 150th story in The Doll's Storybook. I'm trying to figure out what to put into the next physical book.


What's on my needles: The Brioche Shawl Feathers Shawl, continuing progress.

What's on my sewing machine: Sleep mask for Lotta.

What's in my hoop: Still the Whole Cloth Quilt. A little more progress this week.

What's in The Doll's Storybook: You and Me. Jolena gets Mariah's help with a homework assignment that's supposed to prepare her for an English test.


What's on my iPad/iPhone: Finished The Cornwalls Are Gone by James Patterson and Brendan DuBois. Now listening to Hope for the Best by Jodi Taylor.

What's in my wine glass: Sangiovese Negroamaro.

What's my tip of the week: Yukon Gold or Finnish potatoes can be used for any recipe that calls for russet potatoes, but for most purposes, you can get away with not peeling them before cooking. They usually require little or no scrubbing. Great time-saver!

Where's my book: Mariah: Stories from the Doll's Storybook is available from Amazon worldwide. Also available from BookBaby, Barnes & Noble and other booksellers. Royalties go to support pediatric cancer research and treatment. The three stories in the book first appeared in the blog and they are reproduced with few changes. The stories (and links to them) are Being Little, Besties, and Distraction.

Note: This blog post was produced on the iPad and the MacBook, using the iPhone for some photos and some photo processing. No other computer was used in any stage of composition or posting, and no Windows were opened, waited for, cleaned or broken. No animals or dolls were harmed during the production of this blog post.

<a href="https://www.bloglovin.com/blog/7365001/?claim=kkvctsdtf4n">Follow my blog with Bloglovin</a>

<a class="blsdk-follow" href="https://www.bloglovin.com/blogs/highfiber-7365001" target="_blank" data-blsdk-type="button" data-blsdk-counter="false">Follow</a><script>(function(d, s, id) {var js, fjs = d.getElementsByTagName(s)[0];if (d.getElementById(id)) return;js = d.createElement(s);js.id = id;js.src = "https://www.bloglovin.com/widget/js/loader.js?v=1";fjs.parentNode.insertBefore(js, fjs);}(document, "script", "bloglovin-sdk"))</script>